> ## Documentation Index
> Fetch the complete documentation index at: https://docs.capx.ai/llms.txt
> Use this file to discover all available pages before exploring further.
# Let's start building!
### **Step 1. Generate the project**
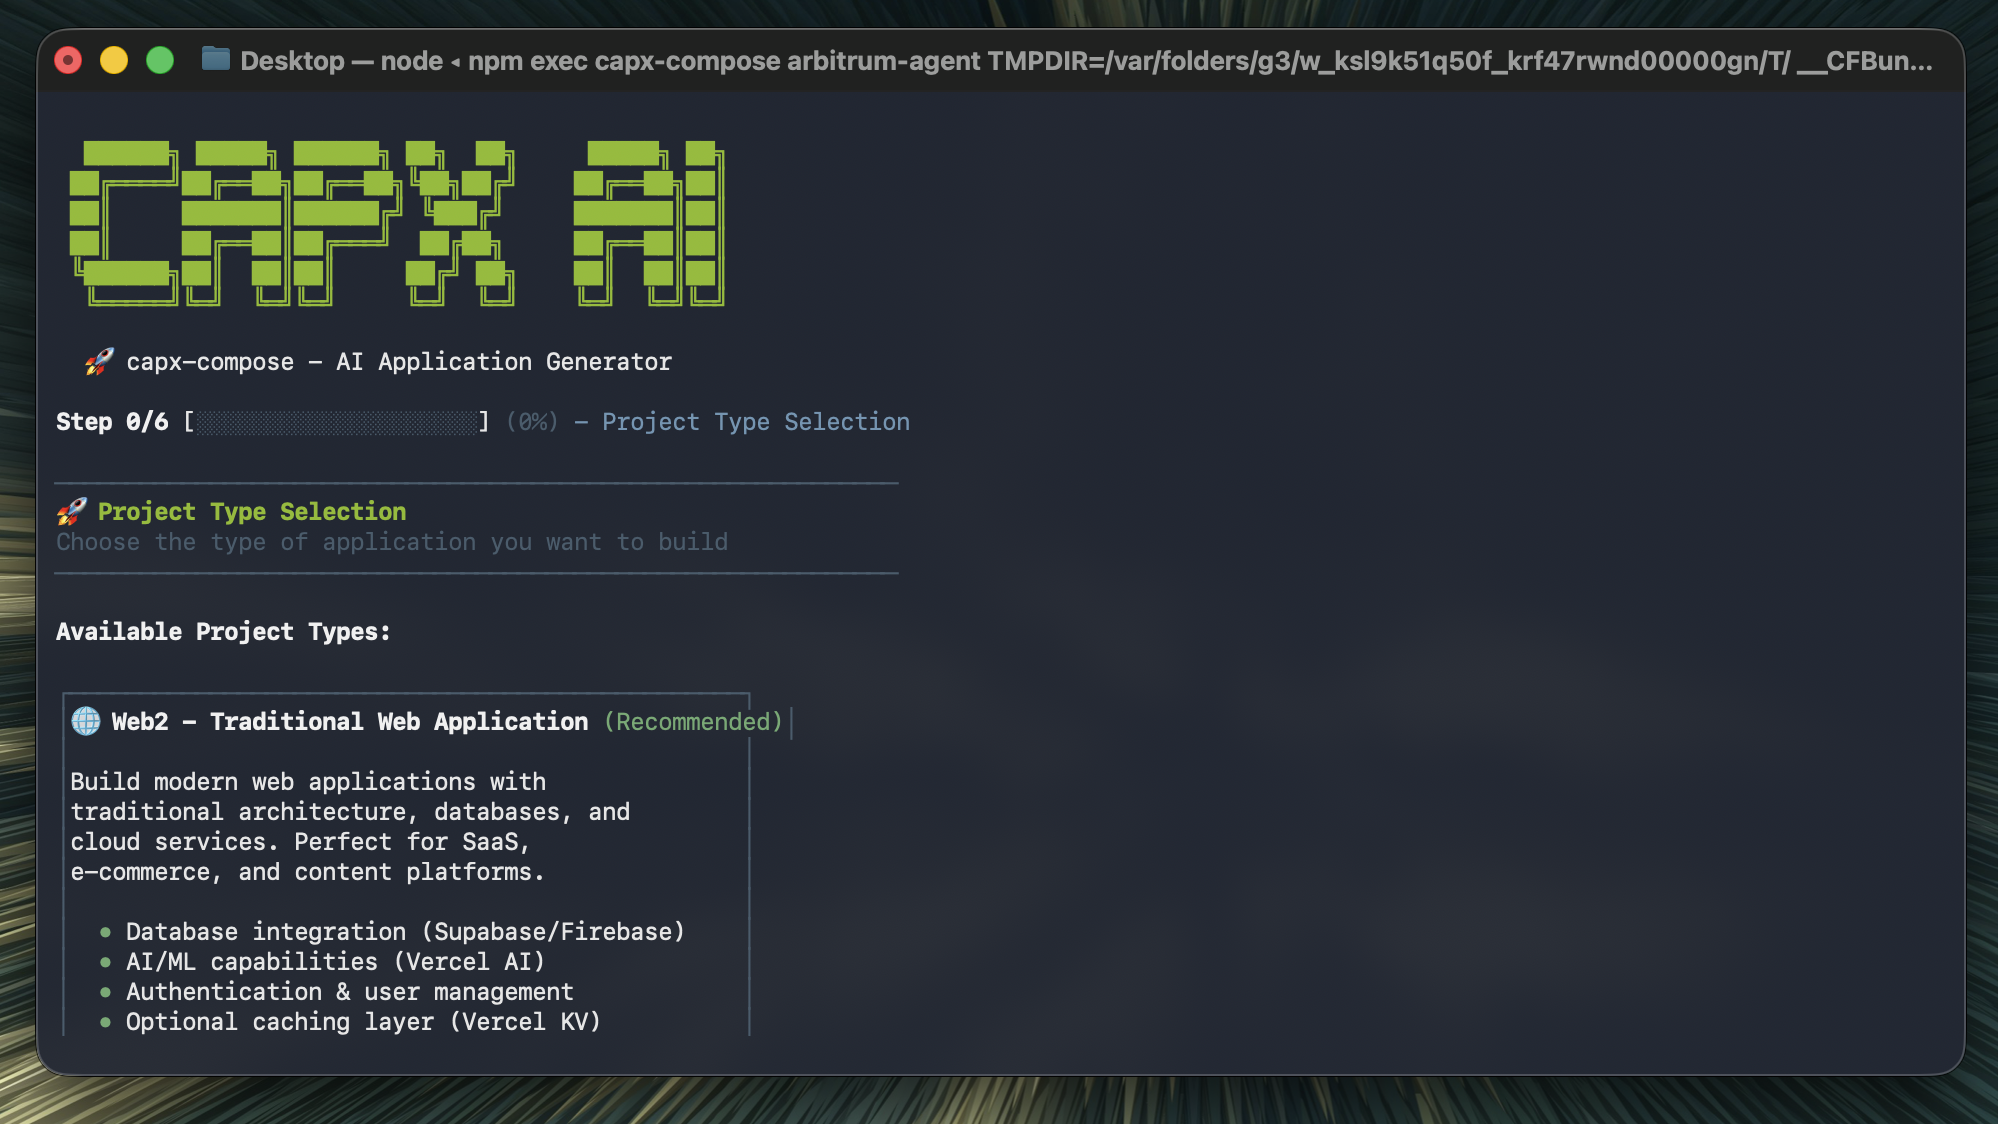 Open your terminal and run:
```bash theme={null}
npx capx-compose arbitrum-agent
```
The CLI will guide you through the setup. For now select:
1. **Web3** - Blockchain/DeFi Application (we're building on-chain)
2. **EVM** - Ethereum Virtual Machine (for Arbitrum and other L2s)
3. **Goat** - Press space to select this AI agent plugin, then enter
4. **No** for ESLint (optional for hackathons)
5. **Yes** to automatically install dependencies
6. **Auto-detect** for package manager
Wait about 3 minutes for the setup to complete. This automatically sets up a Next.js project with:
* **GOAT SDK** configured for blockchain operations
* **EVM wallet integration** auto-included
* **Vercel AI SDK** for streaming GPT responses
* **Working examples** you can extend immediately
Open your terminal and run:
```bash theme={null}
npx capx-compose arbitrum-agent
```
The CLI will guide you through the setup. For now select:
1. **Web3** - Blockchain/DeFi Application (we're building on-chain)
2. **EVM** - Ethereum Virtual Machine (for Arbitrum and other L2s)
3. **Goat** - Press space to select this AI agent plugin, then enter
4. **No** for ESLint (optional for hackathons)
5. **Yes** to automatically install dependencies
6. **Auto-detect** for package manager
Wait about 3 minutes for the setup to complete. This automatically sets up a Next.js project with:
* **GOAT SDK** configured for blockchain operations
* **EVM wallet integration** auto-included
* **Vercel AI SDK** for streaming GPT responses
* **Working examples** you can extend immediately
 ### **Step 2. Configure your environment**
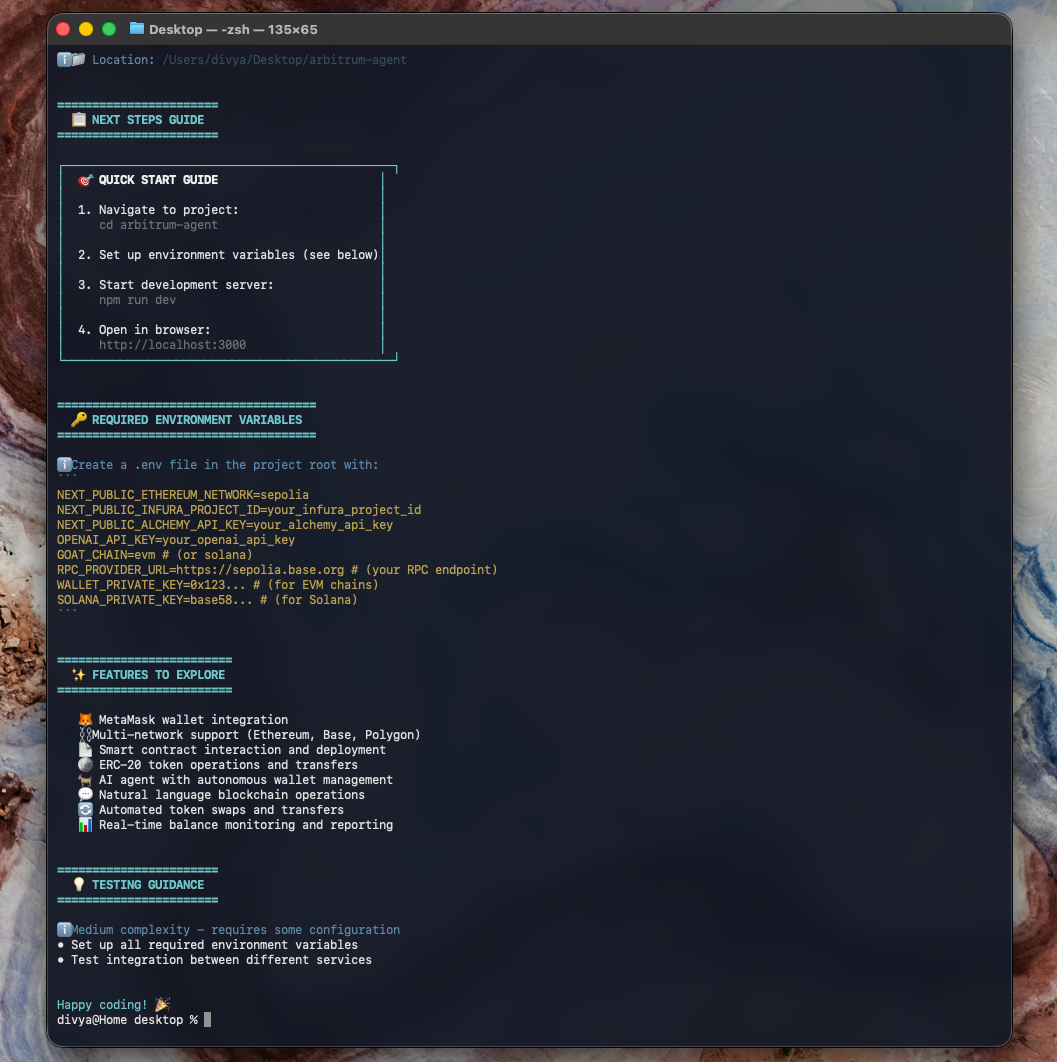
Now your project setup is done, navigate to your project & run the following command:
```bash theme={null}
cd arbitrum-agent
cp .env.example .env.local
```
Open .env.local and add your credentials:
```bash theme={null}
# OpenAI Configuration
OPENAI_API_KEY=sk-... # Get from platform.openai.com/api-keys
# Blockchain Configuration
GOAT_CHAIN=evm
WALLET_PRIVATE_KEY=0x... # Your test wallet private key (we'll create this next)
RPC_PROVIDER_URL=https://sepolia-rollup.arbitrum.io/rpc # Arbitrum testnet
# Optional RPCs (if you need better reliability)
NEXT_PUBLIC_INFURA_PROJECT_ID=... # From infura.io
NEXT_PUBLIC_ALCHEMY_API_KEY=... # From alchemy.com
```
Note: The default RPC suggests Base Sepolia, but we're using Arbitrum Sepolia for this guide.
### **Step 2.5. Create a test wallet**
Since we need a wallet private key, let's create one:
### **Option 1: Using MetaMask (Easiest)**
1. Open MetaMask browser extension
2. Click the account icon → Add Account or Wallet → Create a new account → Ethereum
3. Name it "Hackathon Test" (so you remember it's not your main)
4. Click the three dots → Account details → Export Private Key
5. Enter your password and copy the key
6. Paste it in .env.local as WALLET\_PRIVATE\_KEY=0x...
### **Option 2: Generate programmatically**
```jsx theme={null}
node -e "const { Wallet } = require('ethers'); const w = Wallet.createRandom(); console.log('Address:', w.address); console.log('Private Key:', w.privateKey);"
```
Copy the private key to your .env.local.
> *Important: This is a test wallet. Never put real funds in it. Never use your main wallet for hackathon projects.*
### **Step 3. Configure for Arbitrum**
The template defaults to Base. Let's configure it for Arbitrum specifically.
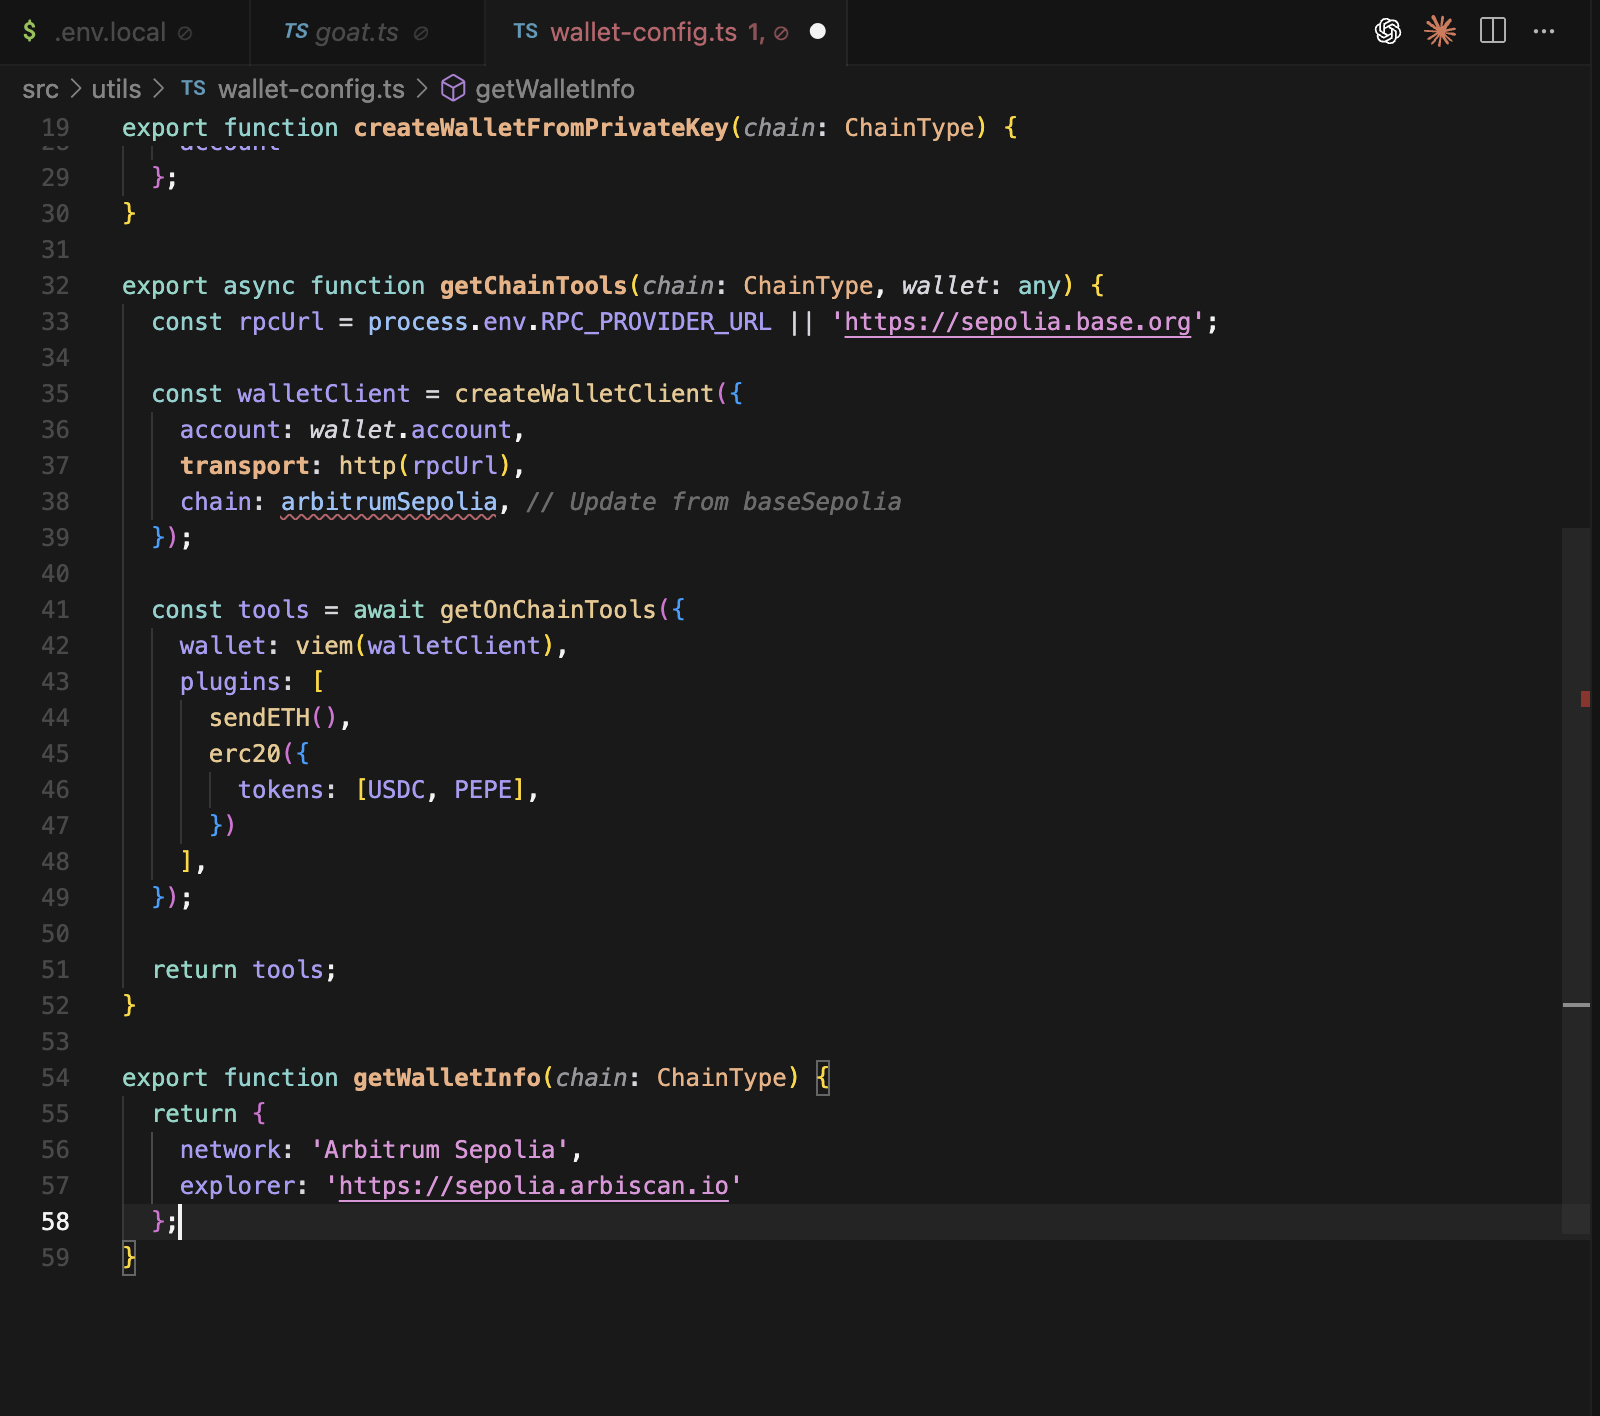
Find your wallet config file at src/utils/wallet-config.ts and update the chain import:
```tsx theme={null}
import { createWalletClient, http } from "viem";
import { privateKeyToAccount } from "viem/accounts";
import { arbitrumSepolia } from "viem/chains"; // Change this from baseSepolia
import { getOnChainTools } from "@goat-sdk/adapter-vercel-ai";
import { viem } from "@goat-sdk/wallet-viem";
// Update the wallet client configuration
const walletClient = createWalletClient({
account: wallet.account,
transport: http(rpcUrl),
chain: arbitrumSepolia, // Update from baseSepolia
});
// Also update the network info
export function getWalletInfo(chain: ChainType) {
return {
network: 'Arbitrum Sepolia',
explorer: 'https://sepolia.arbiscan.io'
};
}
```
### **Step 2. Configure your environment**
Now your project setup is done, navigate to your project & run the following command:
```bash theme={null}
cd arbitrum-agent
cp .env.example .env.local
```
Open .env.local and add your credentials:
```bash theme={null}
# OpenAI Configuration
OPENAI_API_KEY=sk-... # Get from platform.openai.com/api-keys
# Blockchain Configuration
GOAT_CHAIN=evm
WALLET_PRIVATE_KEY=0x... # Your test wallet private key (we'll create this next)
RPC_PROVIDER_URL=https://sepolia-rollup.arbitrum.io/rpc # Arbitrum testnet
# Optional RPCs (if you need better reliability)
NEXT_PUBLIC_INFURA_PROJECT_ID=... # From infura.io
NEXT_PUBLIC_ALCHEMY_API_KEY=... # From alchemy.com
```
Note: The default RPC suggests Base Sepolia, but we're using Arbitrum Sepolia for this guide.
### **Step 2.5. Create a test wallet**
Since we need a wallet private key, let's create one:
### **Option 1: Using MetaMask (Easiest)**
1. Open MetaMask browser extension
2. Click the account icon → Add Account or Wallet → Create a new account → Ethereum
3. Name it "Hackathon Test" (so you remember it's not your main)
4. Click the three dots → Account details → Export Private Key
5. Enter your password and copy the key
6. Paste it in .env.local as WALLET\_PRIVATE\_KEY=0x...
### **Option 2: Generate programmatically**
```jsx theme={null}
node -e "const { Wallet } = require('ethers'); const w = Wallet.createRandom(); console.log('Address:', w.address); console.log('Private Key:', w.privateKey);"
```
Copy the private key to your .env.local.
> *Important: This is a test wallet. Never put real funds in it. Never use your main wallet for hackathon projects.*
### **Step 3. Configure for Arbitrum**
The template defaults to Base. Let's configure it for Arbitrum specifically.
Find your wallet config file at src/utils/wallet-config.ts and update the chain import:
```tsx theme={null}
import { createWalletClient, http } from "viem";
import { privateKeyToAccount } from "viem/accounts";
import { arbitrumSepolia } from "viem/chains"; // Change this from baseSepolia
import { getOnChainTools } from "@goat-sdk/adapter-vercel-ai";
import { viem } from "@goat-sdk/wallet-viem";
// Update the wallet client configuration
const walletClient = createWalletClient({
account: wallet.account,
transport: http(rpcUrl),
chain: arbitrumSepolia, // Update from baseSepolia
});
// Also update the network info
export function getWalletInfo(chain: ChainType) {
return {
network: 'Arbitrum Sepolia',
explorer: 'https://sepolia.arbiscan.io'
};
}
```
 ### **Step 4. Get test ETH**
You'll need some testnet ETH for gas fees:
1. Copy your wallet address (from MetaMask or log it from your code)
2. Visit [https://faucet.quicknode.com/arbitrum/sepolia](https://faucet.quicknode.com/arbitrum/sepolia)
3. Paste your address and claim
4. You'll receive 0.001 ETH, enough for plenty of transactions on Arbitrum
### **Step 5. Test your app**
Start the development server:
```bash theme={null}
npm run dev
```
Navigate to [http://localhost:3000](http://localhost:3000) and click on the "GOAT Example" card to open the agent interface.
### **Step 4. Get test ETH**
You'll need some testnet ETH for gas fees:
1. Copy your wallet address (from MetaMask or log it from your code)
2. Visit [https://faucet.quicknode.com/arbitrum/sepolia](https://faucet.quicknode.com/arbitrum/sepolia)
3. Paste your address and claim
4. You'll receive 0.001 ETH, enough for plenty of transactions on Arbitrum
### **Step 5. Test your app**
Start the development server:
```bash theme={null}
npm run dev
```
Navigate to [http://localhost:3000](http://localhost:3000) and click on the "GOAT Example" card to open the agent interface.
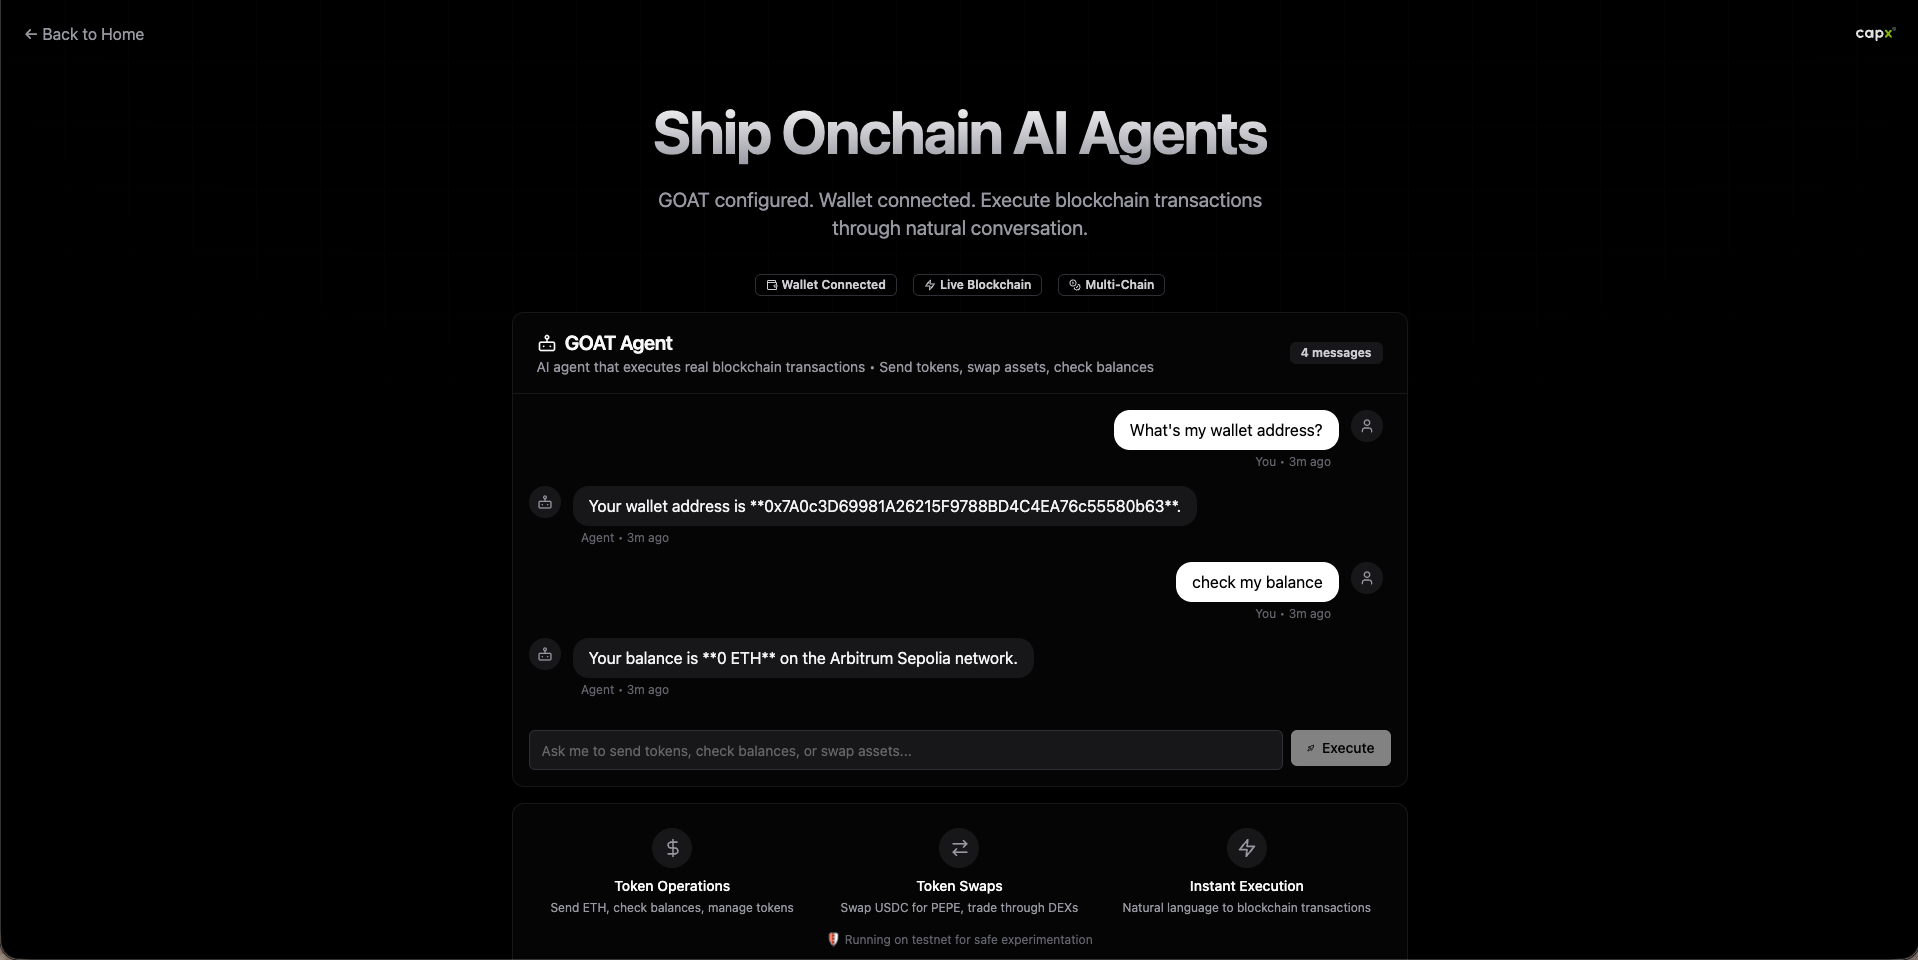 Make sure everything's working.
Try asking your agent: "What's my ETH balance?" You should see your balance (0.001 ETH if the faucet just sent it) and your wallet address.
If it shows 0 ETH, wait 30 seconds for the faucet transaction to confirm. Now let's do something real, send a transaction: "Send 0.0001 ETH to 0x742d35Cc6634C0532925a3b844Bc9e7595f0bEb9"
Your agent will execute the transaction and give you a transaction hash with an Arbiscan link. Click it to verify on-chain - you'll see the transaction confirmed in 2-3 seconds with a green checkmark, showing your wallet as the sender.
**Verifying Your Transaction**
Let's make sure it worked:
1. Click the explorer link in the response, or
2. Visit [https://sepolia.arbiscan.io](https://sepolia.arbiscan.io)
3. Paste your transaction hash in the search box
4. You should see:
* **Status:** Success (green checkmark)
* **From:** Your wallet address
* **To:** The recipient address
* **Value:** 0.0001 ETH
* **Block:** Confirmed within 2-3 seconds
Make sure everything's working.
Try asking your agent: "What's my ETH balance?" You should see your balance (0.001 ETH if the faucet just sent it) and your wallet address.
If it shows 0 ETH, wait 30 seconds for the faucet transaction to confirm. Now let's do something real, send a transaction: "Send 0.0001 ETH to 0x742d35Cc6634C0532925a3b844Bc9e7595f0bEb9"
Your agent will execute the transaction and give you a transaction hash with an Arbiscan link. Click it to verify on-chain - you'll see the transaction confirmed in 2-3 seconds with a green checkmark, showing your wallet as the sender.
**Verifying Your Transaction**
Let's make sure it worked:
1. Click the explorer link in the response, or
2. Visit [https://sepolia.arbiscan.io](https://sepolia.arbiscan.io)
3. Paste your transaction hash in the search box
4. You should see:
* **Status:** Success (green checkmark)
* **From:** Your wallet address
* **To:** The recipient address
* **Value:** 0.0001 ETH
* **Block:** Confirmed within 2-3 seconds