Step 1. Generate the project

Open your terminal and run:
npx capx-compose arbitrum-agent
The CLI will guide you through the setup. For now select:
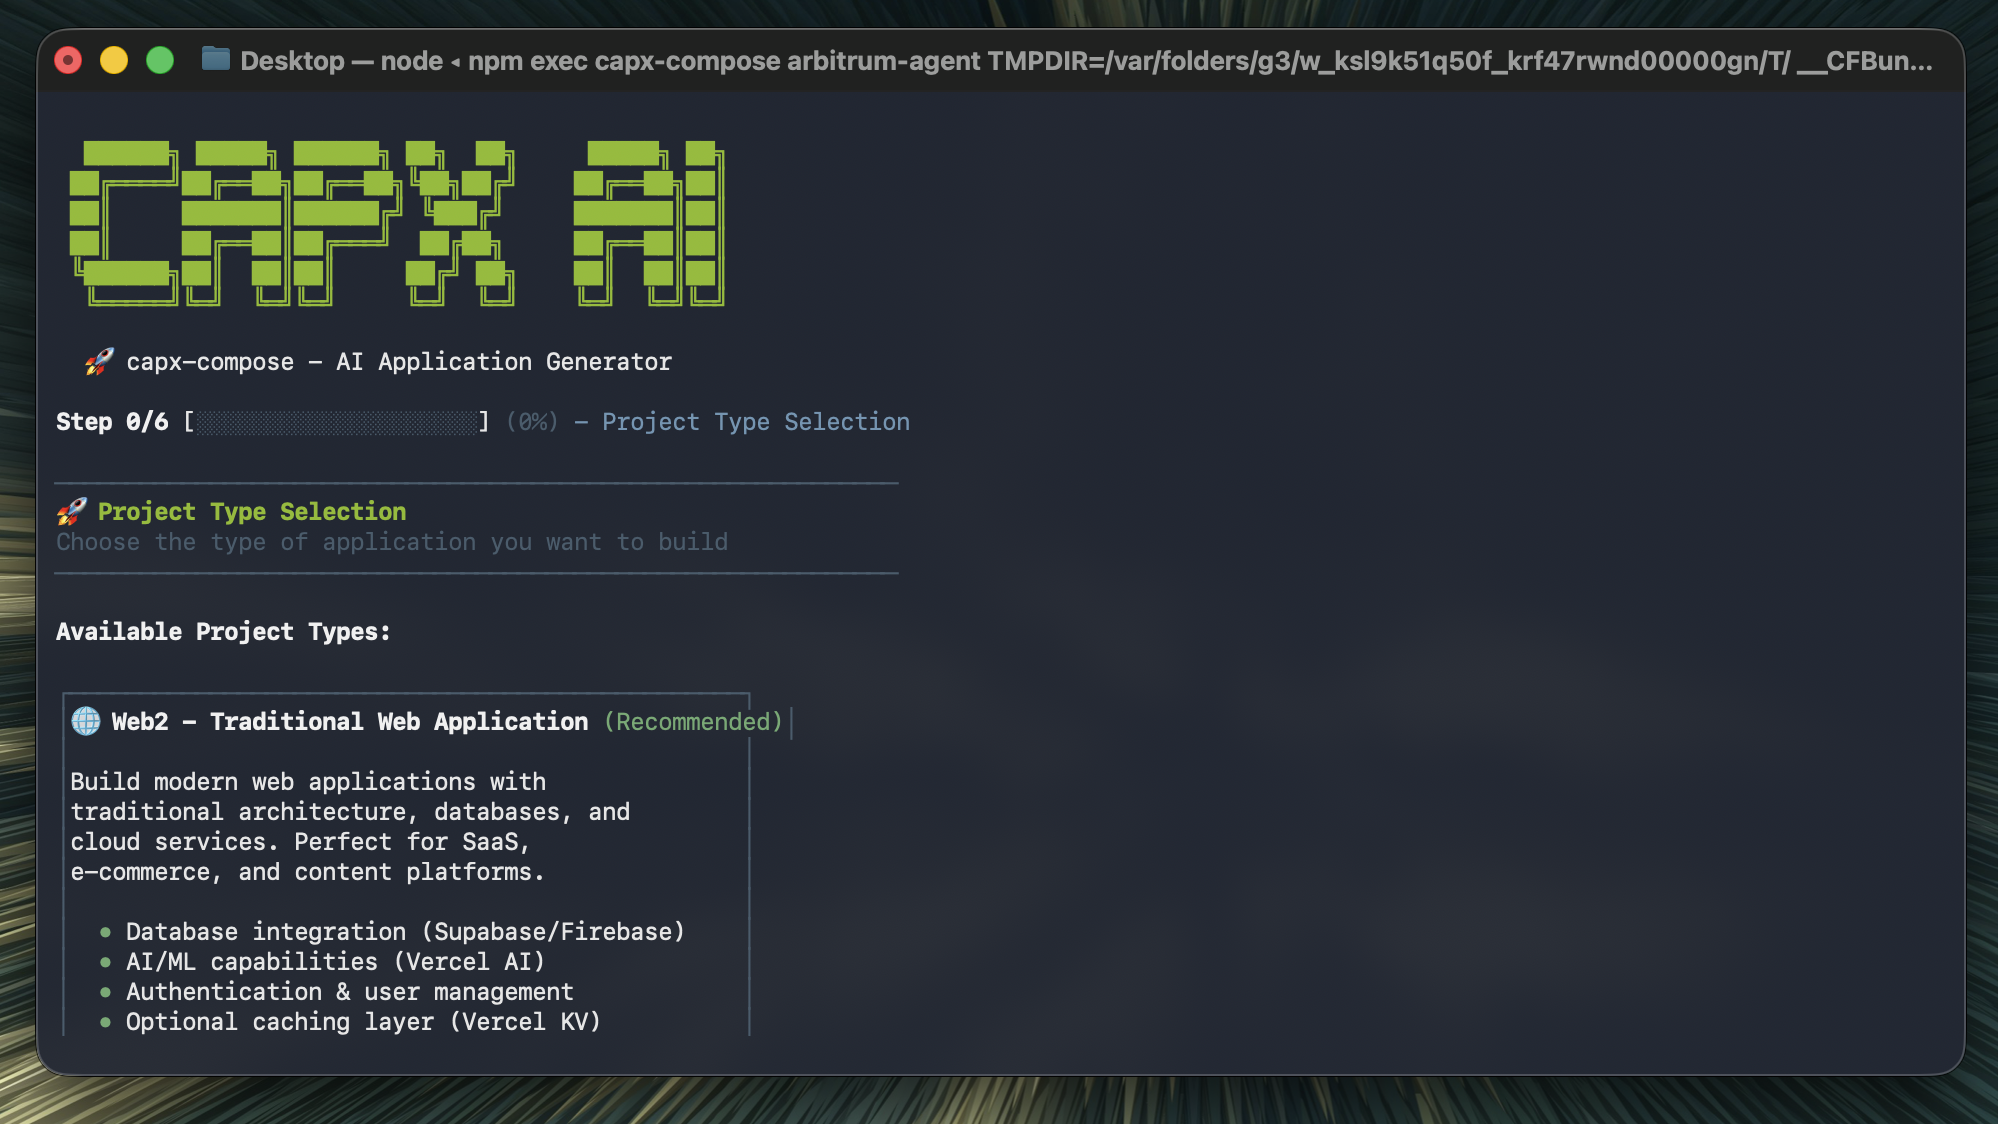
  1. Web3 - Blockchain/DeFi Application (we’re building on-chain)
  2. EVM - Ethereum Virtual Machine (for Arbitrum and other L2s)
  3. Goat - Press space to select this AI agent plugin, then enter
  4. No for ESLint (optional for hackathons)
  5. Yes to automatically install dependencies
  6. Auto-detect for package manager
Wait about 3 minutes for the setup to complete. This automatically sets up a Next.js project with:
  • GOAT SDK configured for blockchain operations
  • EVM wallet integration auto-included
  • Vercel AI SDK for streaming GPT responses
  • Working examples you can extend immediately

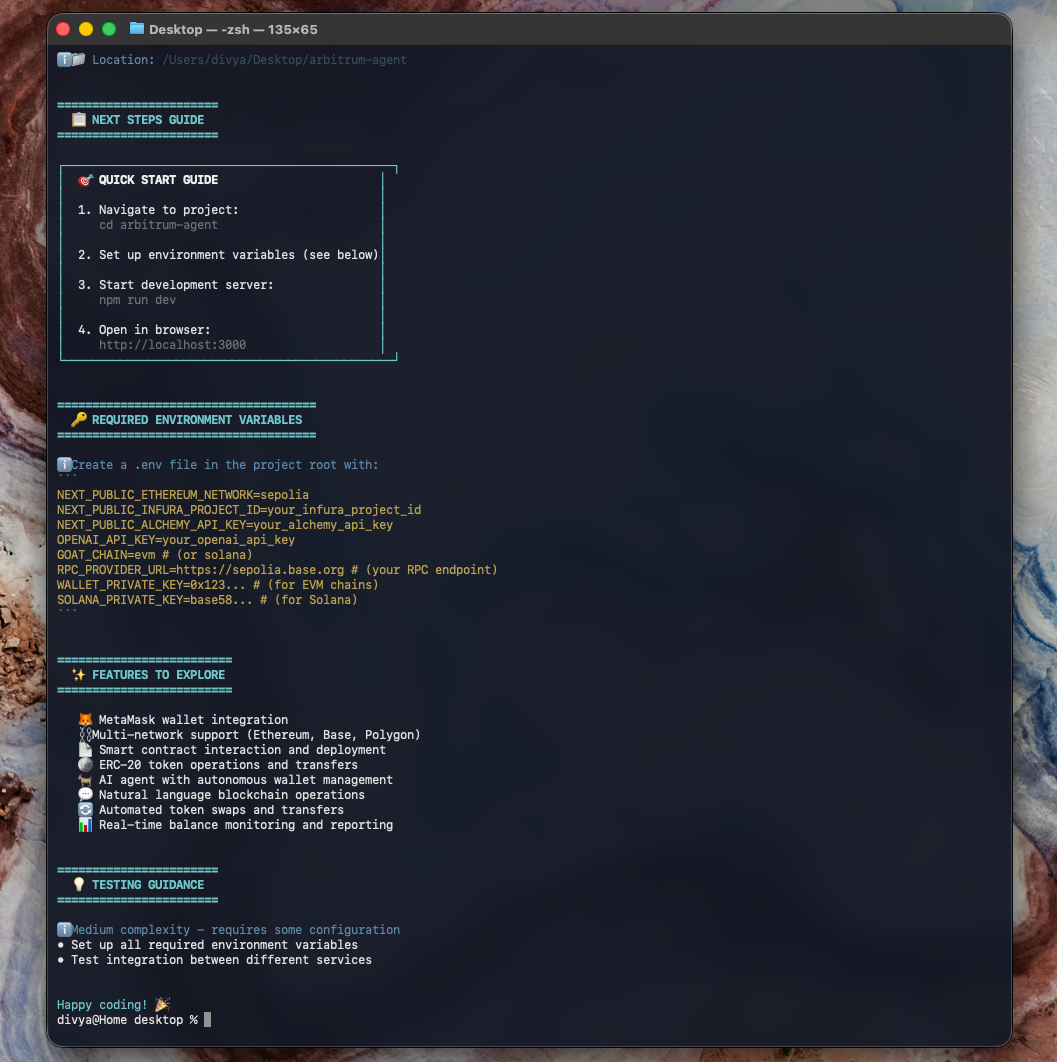
Step 2. Configure your environment

Now your project setup is done, navigate to your project & run the following command:
cd arbitrum-agent
cp .env.example .env.local
Open .env.local and add your credentials:
# OpenAI Configuration
OPENAI_API_KEY=sk-... # Get from platform.openai.com/api-keys

# Blockchain Configuration
GOAT_CHAIN=evm
WALLET_PRIVATE_KEY=0x... # Your test wallet private key (we'll create this next)
RPC_PROVIDER_URL=https://sepolia-rollup.arbitrum.io/rpc # Arbitrum testnet

# Optional RPCs (if you need better reliability)
NEXT_PUBLIC_INFURA_PROJECT_ID=... # From infura.io
NEXT_PUBLIC_ALCHEMY_API_KEY=... # From alchemy.com
Note: The default RPC suggests Base Sepolia, but we’re using Arbitrum Sepolia for this guide.

Step 2.5. Create a test wallet

Since we need a wallet private key, let’s create one:

Option 1: Using MetaMask (Easiest)

  1. Open MetaMask browser extension
  2. Click the account icon → Add Account or Wallet → Create a new account → Ethereum
  3. Name it “Hackathon Test” (so you remember it’s not your main)
  4. Click the three dots → Account details → Export Private Key
  5. Enter your password and copy the key
  6. Paste it in .env.local as WALLET_PRIVATE_KEY=0x…

Option 2: Generate programmatically

node -e "const { Wallet } = require('ethers'); const w = Wallet.createRandom(); console.log('Address:', w.address); console.log('Private Key:', w.privateKey);"
Copy the private key to your .env.local.
Important: This is a test wallet. Never put real funds in it. Never use your main wallet for hackathon projects.

Step 3. Configure for Arbitrum

The template defaults to Base. Let’s configure it for Arbitrum specifically. Find your wallet config file at src/utils/wallet-config.ts and update the chain import:
import { createWalletClient, http } from "viem";
import { privateKeyToAccount } from "viem/accounts";
import { arbitrumSepolia } from "viem/chains"; // Change this from baseSepolia
import { getOnChainTools } from "@goat-sdk/adapter-vercel-ai";
import { viem } from "@goat-sdk/wallet-viem";

// Update the wallet client configuration
const walletClient = createWalletClient({
  account: wallet.account,
  transport: http(rpcUrl),
  chain: arbitrumSepolia, // Update from baseSepolia
});

// Also update the network info
export function getWalletInfo(chain: ChainType) {
  return {
    network: 'Arbitrum Sepolia',
    explorer: 'https://sepolia.arbiscan.io'
  };
}

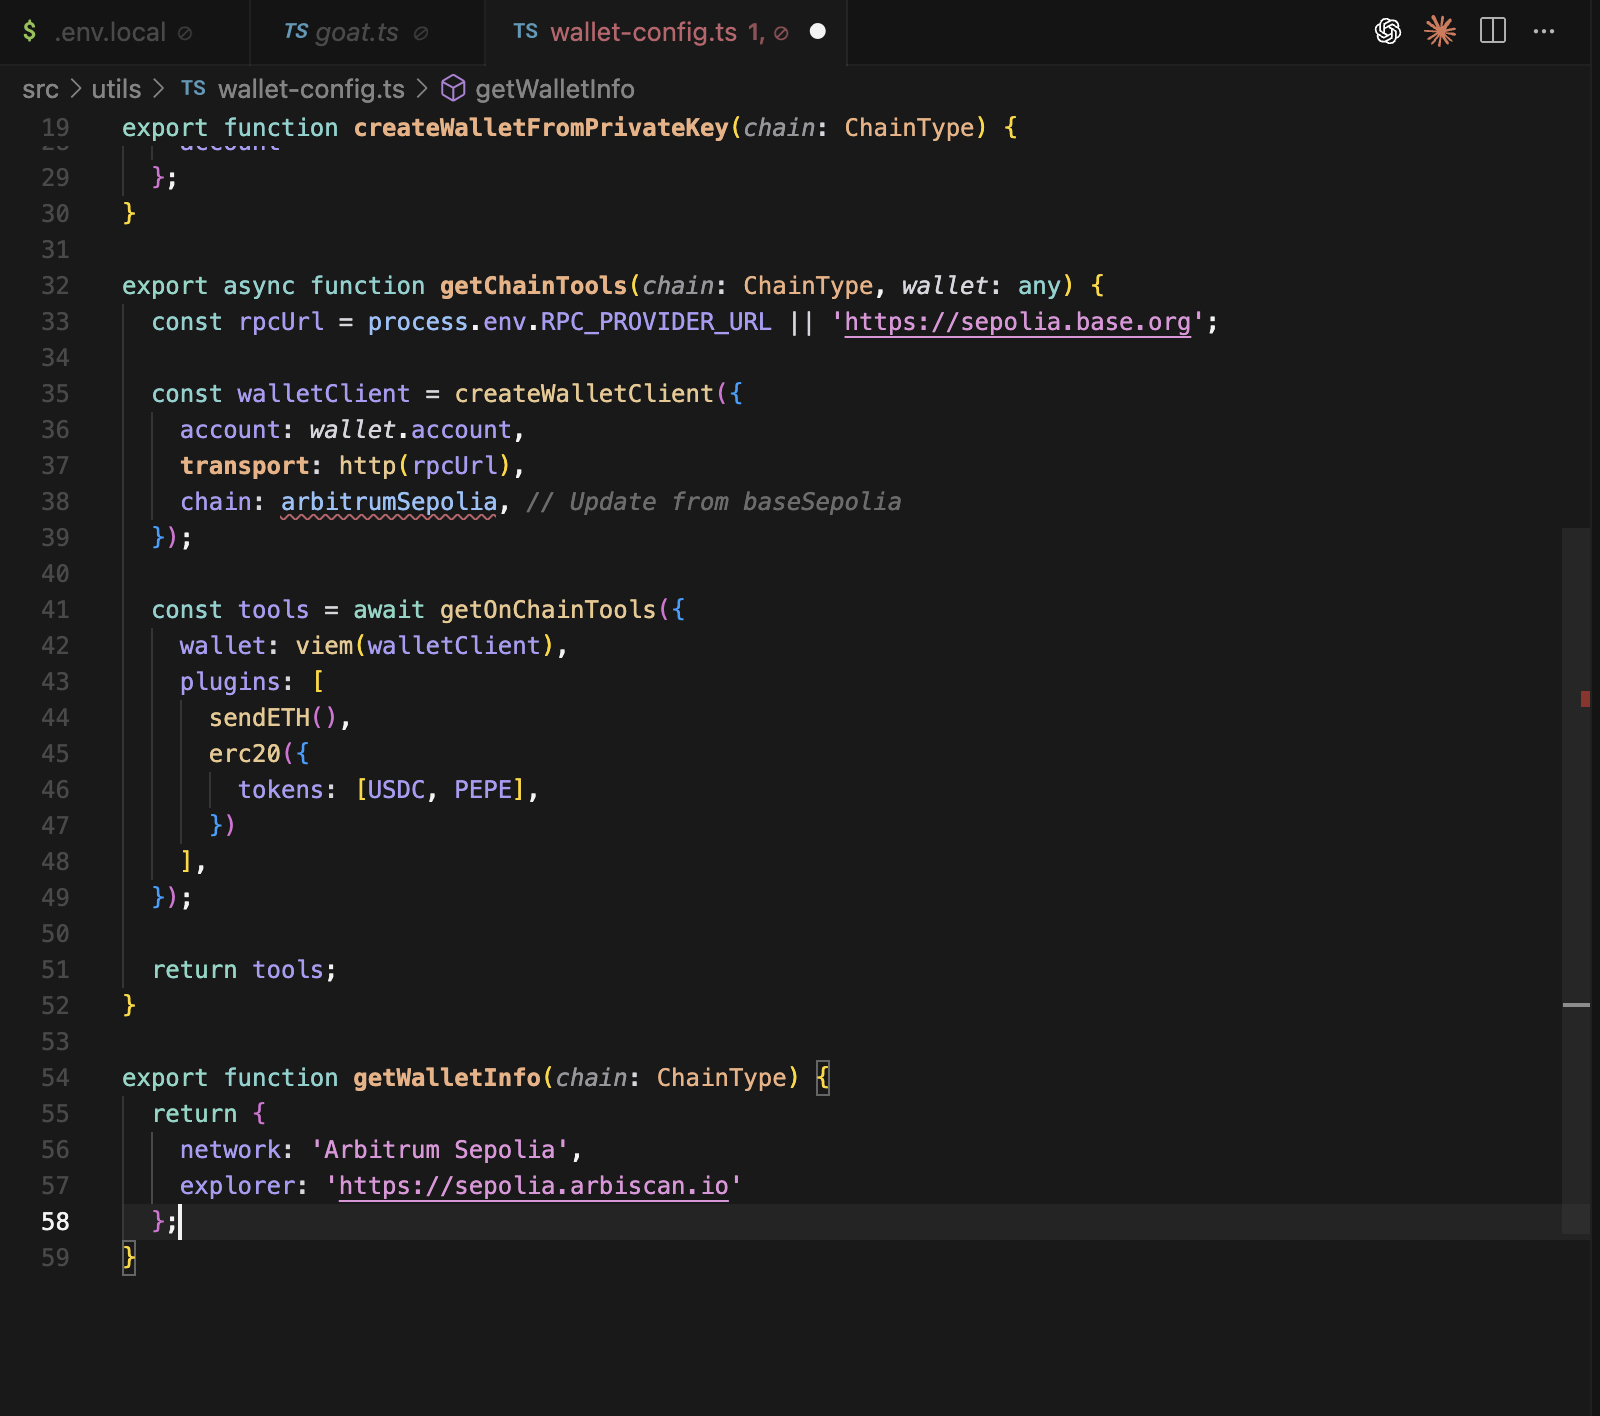
Step 4. Get test ETH

You’ll need some testnet ETH for gas fees:
  1. Copy your wallet address (from MetaMask or log it from your code)
  2. Visit https://faucet.quicknode.com/arbitrum/sepolia
  3. Paste your address and claim
  4. You’ll receive 0.001 ETH, enough for plenty of transactions on Arbitrum

Step 5. Test your app

Start the development server:
npm run dev
Navigate to http://localhost:3000 and click on the “GOAT Example” card to open the agent interface. Make sure everything’s working. Try asking your agent: “What’s my ETH balance?” You should see your balance (0.001 ETH if the faucet just sent it) and your wallet address. If it shows 0 ETH, wait 30 seconds for the faucet transaction to confirm. Now let’s do something real, send a transaction: “Send 0.0001 ETH to 0x742d35Cc6634C0532925a3b844Bc9e7595f0bEb9” Your agent will execute the transaction and give you a transaction hash with an Arbiscan link. Click it to verify on-chain - you’ll see the transaction confirmed in 2-3 seconds with a green checkmark, showing your wallet as the sender. Verifying Your Transaction Let’s make sure it worked:
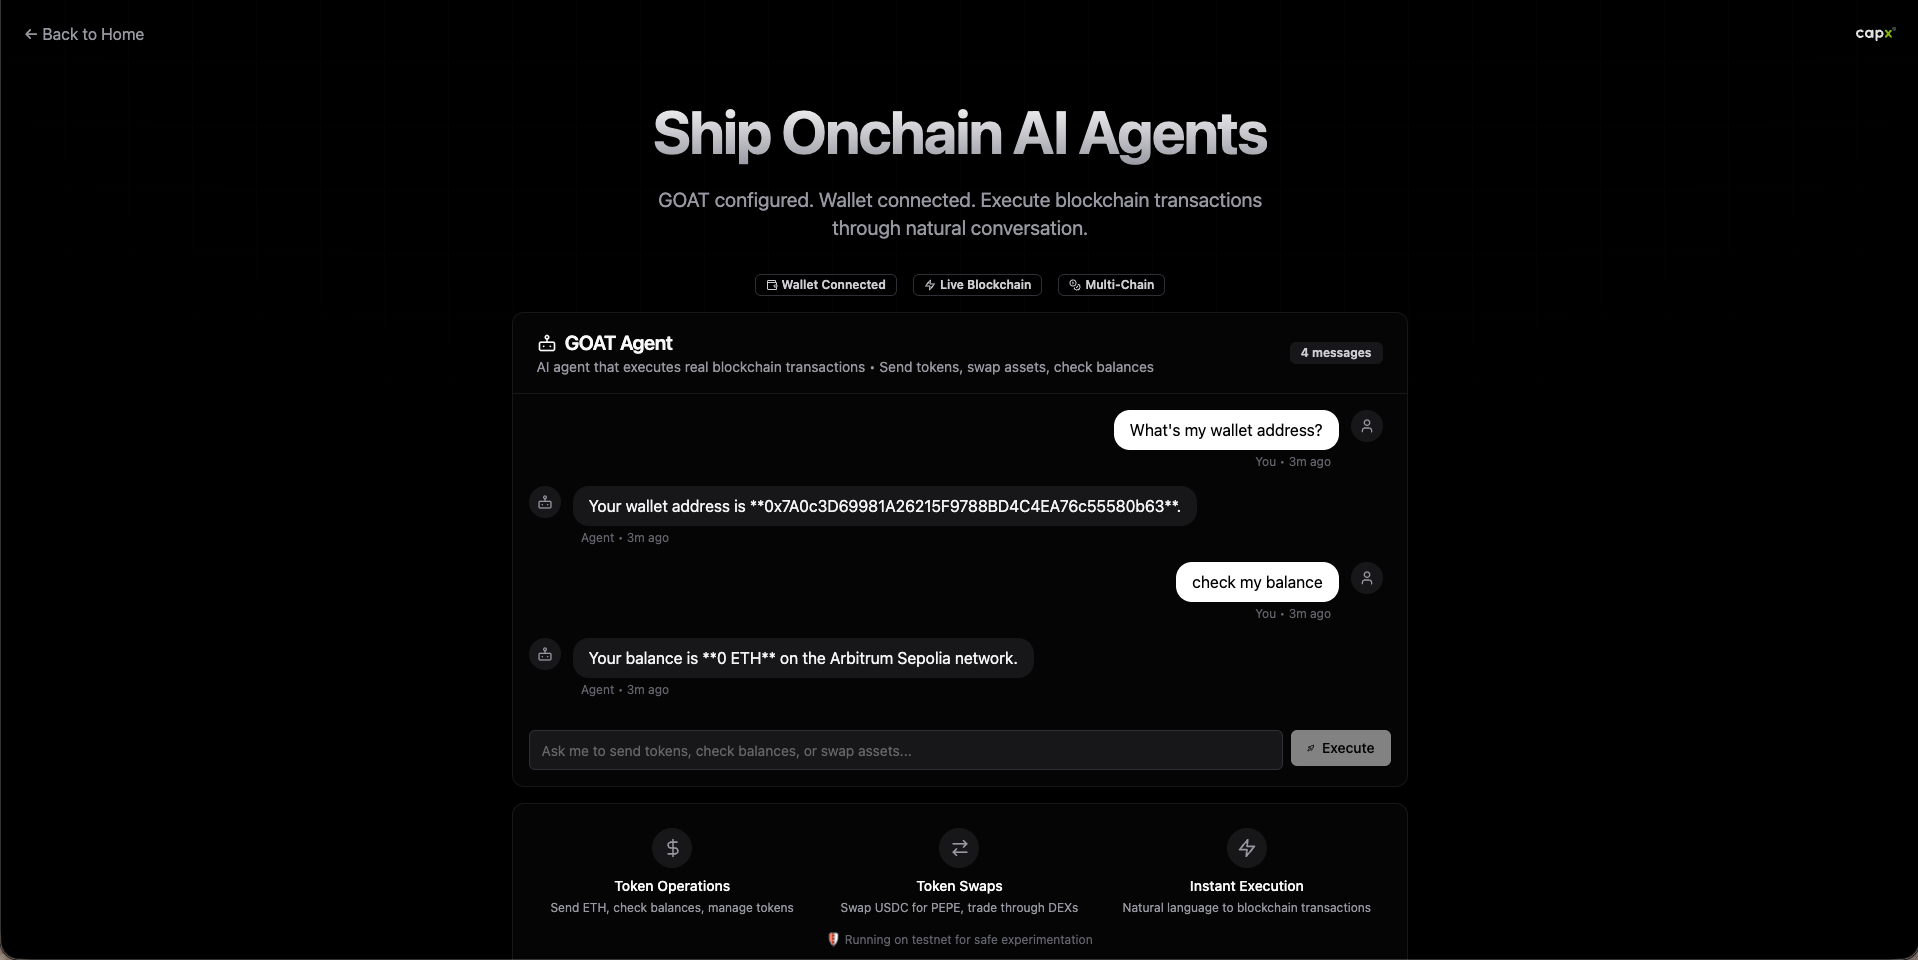
  1. Click the explorer link in the response, or
  2. Visit https://sepolia.arbiscan.io
  3. Paste your transaction hash in the search box
  4. You should see:
  • Status: Success (green checkmark)
  • From: Your wallet address
  • To: The recipient address
  • Value: 0.0001 ETH
  • Block: Confirmed within 2-3 seconds